


As promised on Tuesday's post, I have taken a SLEW of pictures for today's post! I made a crisscross card. I saw this idea awhile back on Faith Abigail's blog, then I got reminded of it when I read the article on it in my Card Maker's magazine this month! So, here is the start of the card!!!
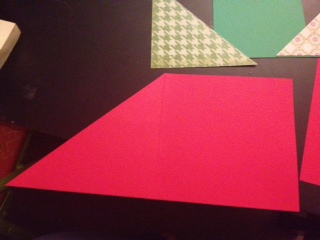
First you need a piece of any solid color card stock of your choice. It needs to be 5 1/2 by 11 and scored at 5 1/2 Then you cut from the bottom right hand side up to the top of your score line (on a diagonal). Here is what the piece should look like:

Next, you will repeat with another piece of the same color card stock as in step 1, except this time, you will cut from the bottom LEFT hand side corner up to the top of your score line.
Now that you have your two pieces all ready for the "pocket" section of your crisscross card, you can glue the 2 square pieces together.

Now, you need your decorative corner pieces. These are the bottom triangles that we will be cutting up. The easiest way to make them is like so: cut a square of 5 X 5 and cut in half on a diagonal. VERY SIMPLE! You will use 1 solid color as a mat (pieces cut from 5 X 5 square), and 2 patterned pieces to be the pieces shown (cut from 4 3/4 X 4 3/4 square).

After you get your angle pieces done, you will need another patterned paper square cut at 5 1/4 X 5 1/4. You do NOT cut this one is half. Instead, it stays as a square piece. You will use this to mount on the inside of the angles before you seal them on to make the card.

This is what our card will look like before we finish it up. On the 2 red angles, we will be adding our green solid mat and then our patterned piece of paper.

Now, VERY IMPORTANT!!!! You must follow these steps correctly, or you will seal your card in the wrong areas, and you wont be able to fit your piece of card stock with your sentiment stamp. After you mount your top main piece (in the picture, its the green paisley looking piece of patterned paper), you will then attach your green mat, followed by your patterned card stock, ALL ON THE LEFT SIDE FIRST! Then, you will repeat for the right hand side. Next, and this is VERY IMPORTANT, you will run your adhesive along the BOTTOM OF THE CARD ONLY! This is the green paisley paper that I mean to run adhesive on. Then, fold in the LEFT HAND SIDE. Now, put adhesive on the bottom right hand side corner of the right side fold. You should be gluing on the back of the patterned paper (on the red part). You will NOT glue the ENTIRE piece, cause if you do, you will not be able to slid the sentiment card in!!! I hope that was clear!

Now, here is my finished inside of card!!!

So, that's it! I hope this was easy!! I will be taking more and more pics as my posts go on. This was the most I took, and I had to remember it all!


0 comments:
Post a Comment